Preparation, Planning, and First Steps
Dan Neubecker & Dave Tutelman -- March 19, 2005
Pre-purchase planning
Please fully read all the instructions, the various parts lists and
component assemblies lists, and study the photographs and plans
carefully. There are decisions that you have to make prior to
shopping that will guide you in your purchases. Some parts can
be built from hardwood stock, hardwood plywood, or UHMW stock. But do not free-lance materials that the plans do not recommend.
Also, there are several handle and other related hardware options that
you must choose from before you should attempt to make all your
purchases. In other words, understand your options and choices
before you purchase.
Planning the wood and aluminum components construction
After pre-planning and purchasing of the parts, you are ready to begin to plan the wood and aluminum parts of the construction.
First, determine what specific parts will be made from hardwood, hardwood plywood or UHMW.
I think it is wise to layout, on paper at least, how each part can be
fashioned from the larger pieces you have purchased, and how you will
make cuts needed to create them. Remember to check the plans and
the following text for the orientation of the grain of the hardwood
pieces. Grain direction is indicated by an arrow on the plans and
is important to follow.
You might want to consider cutting all the basic building blocks
for
all the wood parts before starting on any fine detail. All the
wood parts start out as simple rectangular blocks of wood, which are
then altered to create their final shapes.
You might also want to lightly sand the edges of the hardwood plywood
pieces as you go to help avoid splinters.
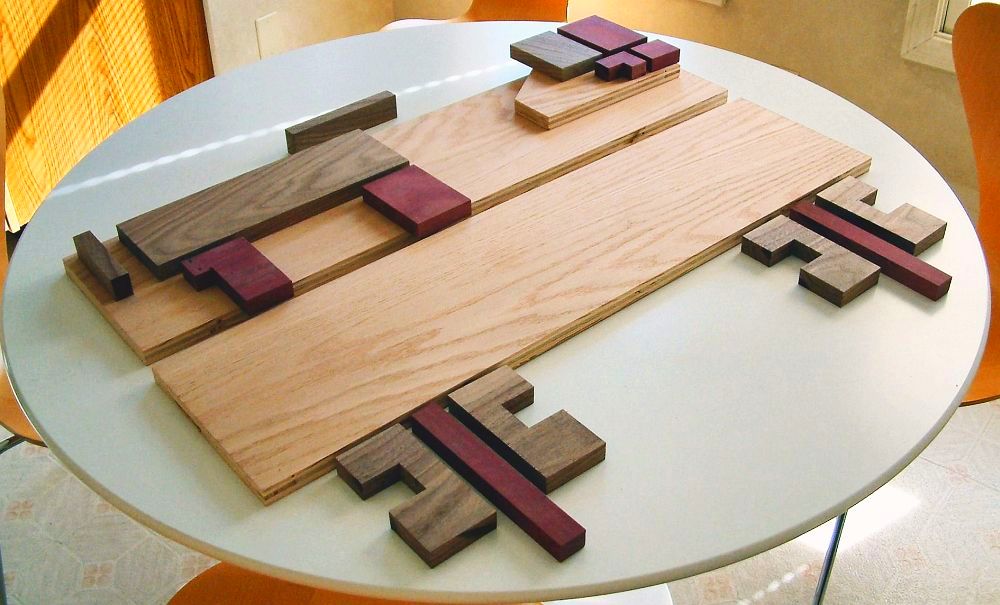
Here are a few photos of the
wood pieces, rough-cut to size and shape.

Wood parts cut to size and shape
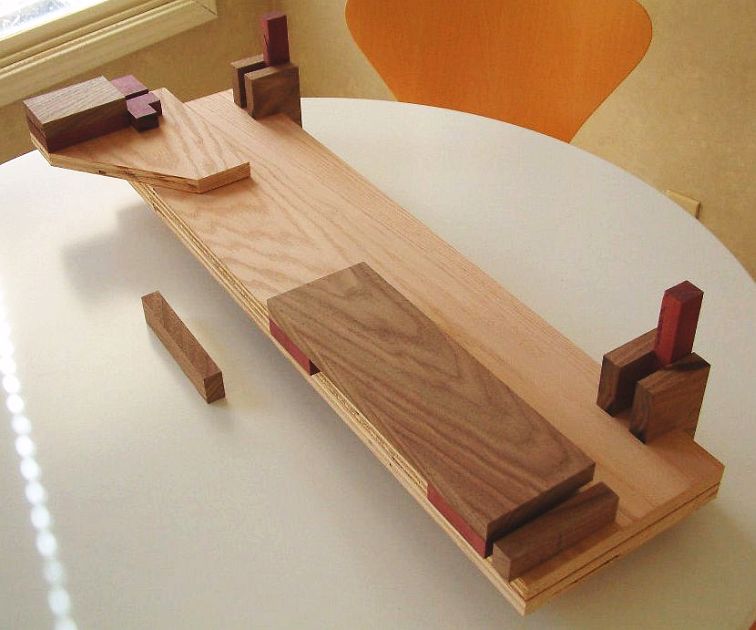
|
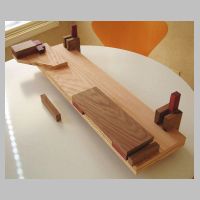
Parts arranged as an assembly mockup.
(The handle wood is for a Handle #2.)
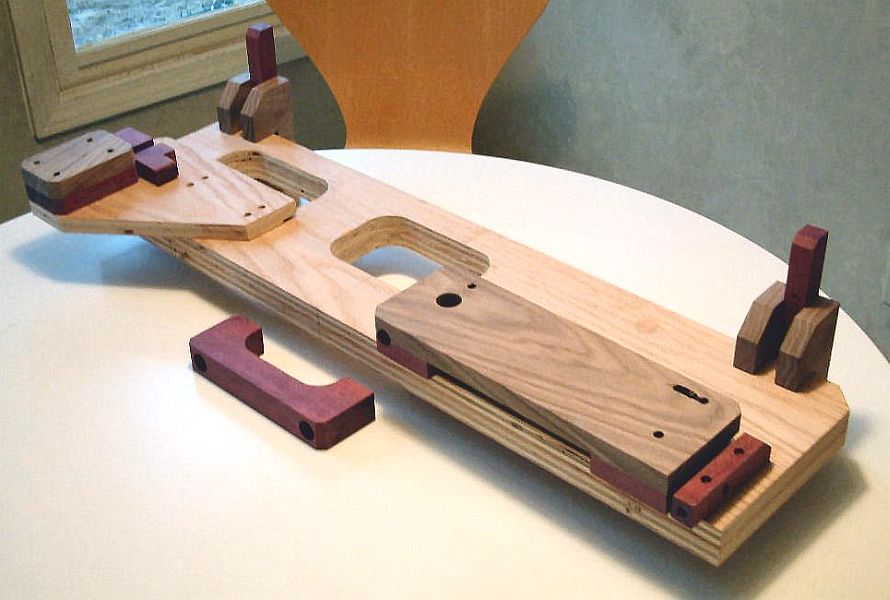
|
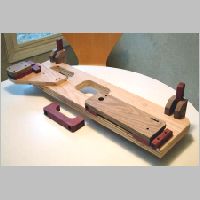 
The wood parts have been drilled and sanded, and placed in an assembly mockup.
(This time the handle wood is for a Handle #1.)
|
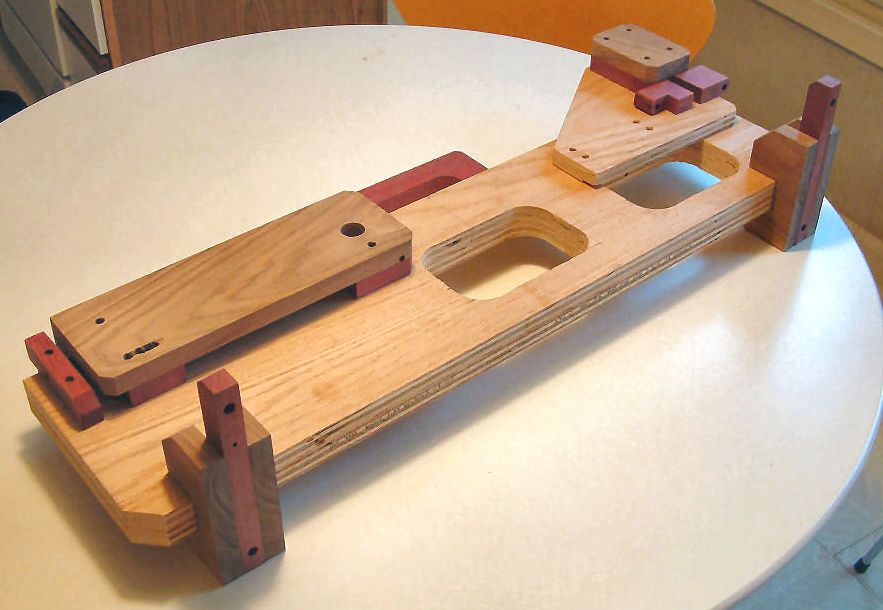
You can cut all the aluminum and UHMW parts at this time as well.
Other hints
- Where the instructions say to drill
through a finished piece of wood stock to the other side:
- Use a drill press for all drilling (except where noted) to assure that your work piece will be set up so that holes
are drilled 90º to the surface.
- Clamp the subject piece down to your drill press table
with a scrap piece of wood secured between your work piece and your
drill press table, so that drill bits exit the back of the material into fresh wood. This scrap board technique will
protect the finished piece from oils that may be on the drill press
and, more importantly, will greatly reduce splintering as the drill bit
exits the backside of your work piece.
-
In order to drill all the holes as precisely as possible, use a sharp hole punch or nail to make a starter hole for your drill
bit. First measure and mark the location and then tap a small
starter hole with the punch or nail at each location. If you do
this, and use pilot or brad-point type bits, you should be able to get
very accurately located holes, without worry of the bit
“wandering”.
-
For holes and counterbores, from ½” and larger, I recommend using Forstner bits.
- For
counterbored holes, drill the counterbore first. If you try to
counterbore an already-finished hole, the drill will wander and the
counterbore will be sloppy at best and mangled at worst.
- Where the plans say "wipe off the excess glue", you may want to consider how and even whether to do it:
- If you intend to finish the wood in its natural color, then
wipe the excess glue with a damp towel. This also works if you intend
to paint the wood.
- If you are planning to stain the wood, you don't want to smear
the glue around to clog the grain. Instead, wait until the glue hardens
a bit (to a dry but flexible state) and then cut it off.
- The
instructions assume you are using a table saw. If your saw is a radial
arm saw, you may have to find a different way to fabricate pieces. Yes,
it can and has been done with a radial arm saw, but it's easier with a
table saw.
- A router will make a few steps distinctly easier, but this can be built without a router.
Last modified 8/21/2005 by Dave Tutelman